CC Digital Human Contest 2020 - Man of Steel - Work In Progress
Glad to participate to this Contest! In the next days, I will try to create a Superman model, inspired by the Dawn of Justice Suit and Henry Cavill face. Here is the first step of creation, using Headshot and Character Creator. Next, I will try to sculpt it in Blender and use the modify tools in Character Creator, and try to make it lookalike !

Creating Henry Cavill face as Step 1

Exporting as .obj as Step 2

Step 3: Beginning the sculpt work in Blender

Step 4: After 2 hours of hard work, the result looks promising and much more realistic !

Step 4: another angle. Then export it to .obj once finished.

Step 5: Replacing mesh importing the .obj file I just created.

Ok, looks kinda creepy for now. Still needs a lot of work in Character Creator and Photoshop...

Step 6: export the face diffuse map at 4096x4096 and begin to draw and correct all the imperfection to make the skin look more realistic.

Use as many layers as you wish, every detail count.
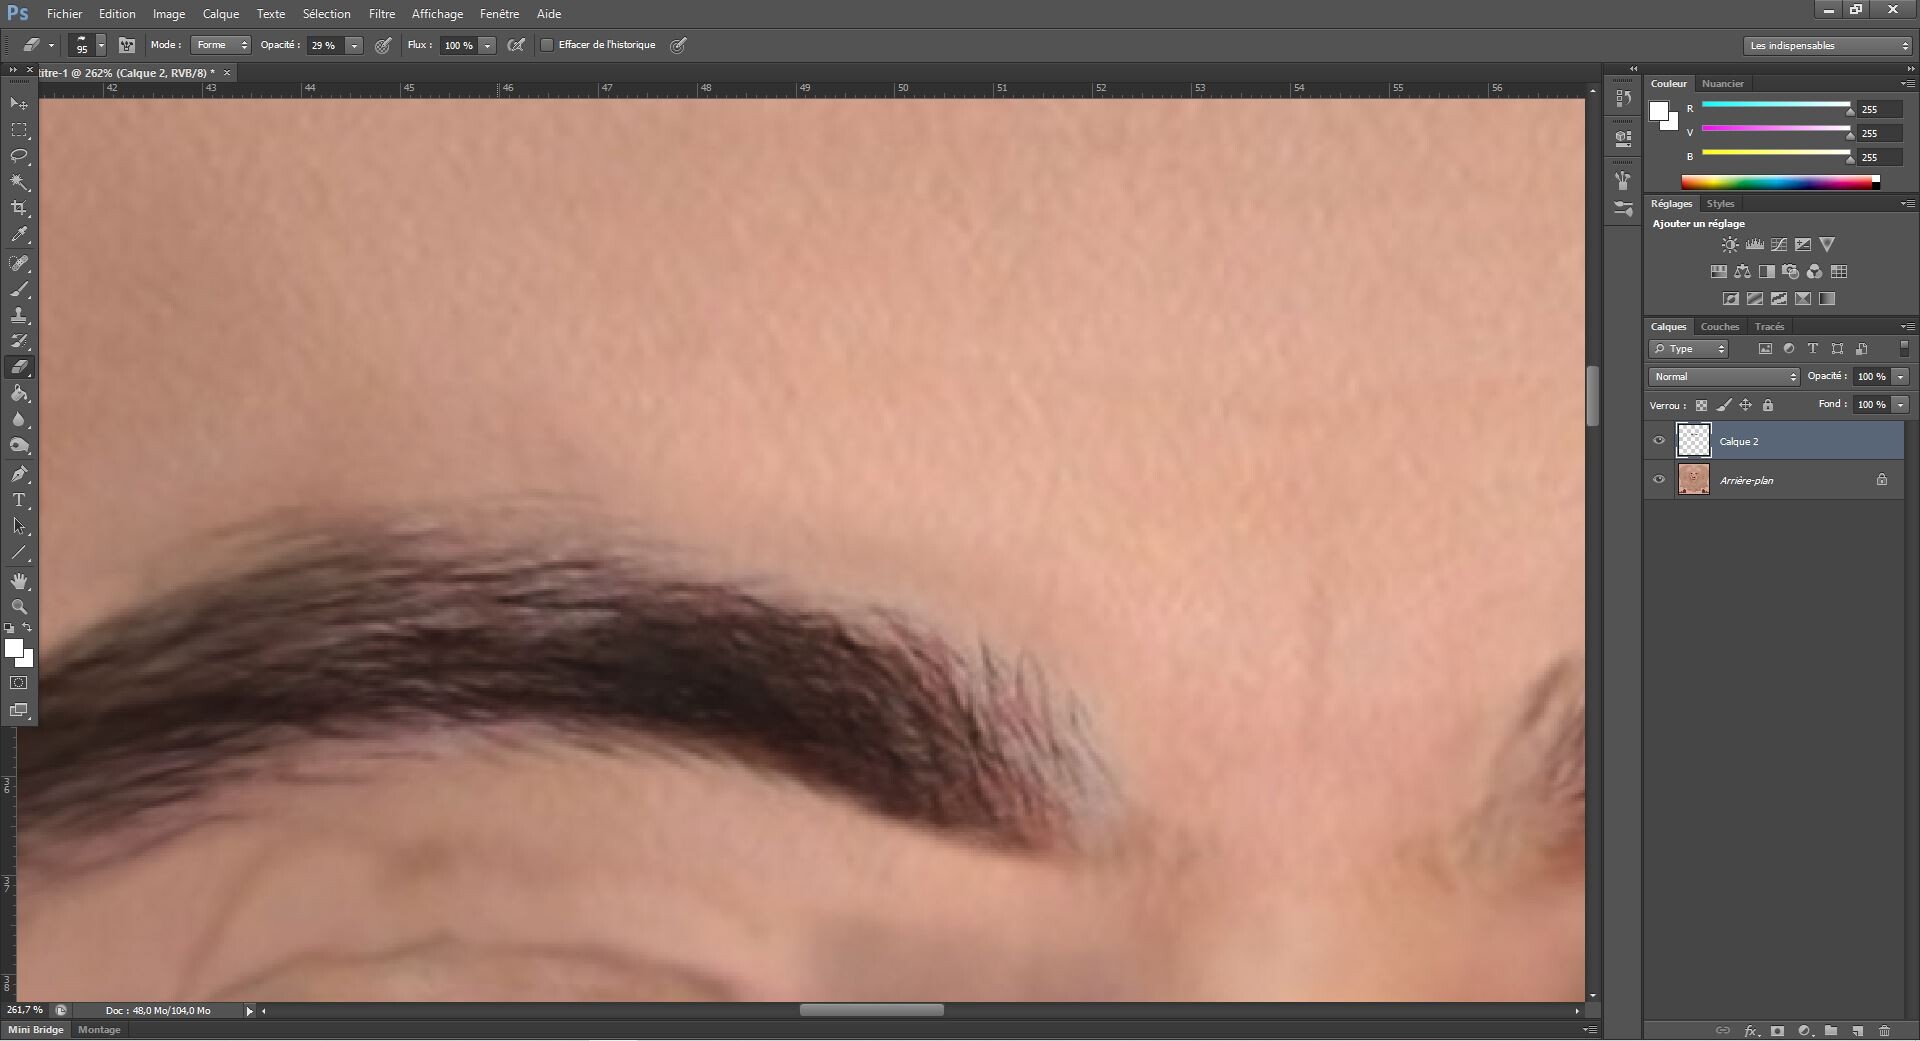
The eyebrows look fine. Now it is time to see the result in iclone.

Step 7: Doesn't look so bad !! Time to launch Character Creator.

Step 8: Launch Character Creator and import the new .iavatar just created in iclone. Then launch the skin editor.
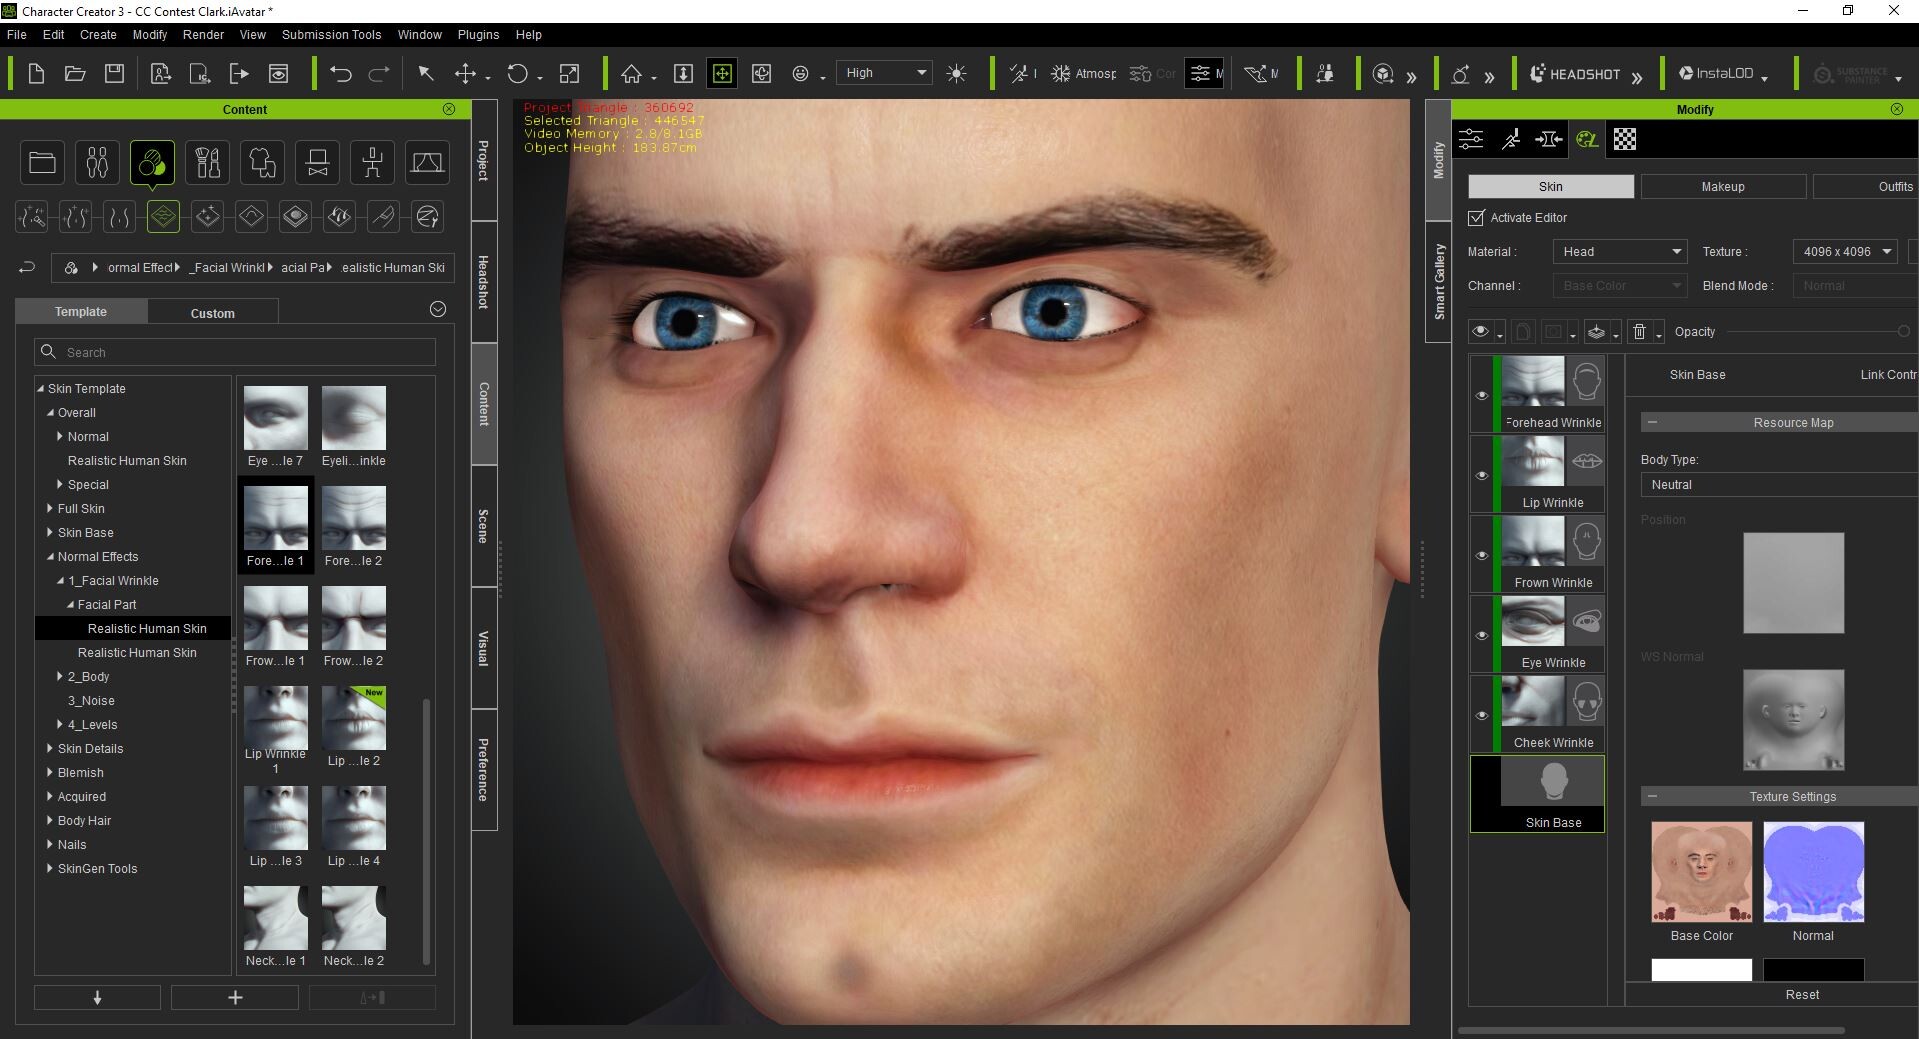
Step 8: so far so good. Apply all the last morphs and the layers in the skin editor.

Step 9: Apply the Realistic Human Morphs to simulate the muscles.

Applying more details to the anatomy.

Here is a promising Superman.. But still bald. Next step: modeling the hair!

Here is the hair model I'm gonna work on to create Superman hair.

One of the images I will use to create the hair mesh.

import the hair model to daz and export it to obj

Here we are: the hair model looks really nice and detailed. But I need to lower the amount of faces, they are too much to deal with.

Using the decimate tool in Blender.

Next, invert X axis on Blender.

Import the obj model of Superman Body to adjust the hair mesh to the head.

this is the image that I will use as a model for the hair.

I can now begin to sculpt it to make it look like Superman Hair.

Still adjusting the hair in Edit and Sculpt Mode and deleting all the faces that I won't use.

Adding some sideburns next (mesh also from Dazstudio)

sideburn on the right side

Working next on the decimated top I added later. The top was separated from the rest of the hair so I could work on it more easily: sculpting and giving the correct shape before merging it to the rest of the hair.

The shape begins to look really good.

And here we are, the final result of Superman hair.

Some view of the back.

From the top.

And right side.
Hair done after 5 hours of hard work.
Next step: export it to Character Creator.

Next step: import in Character Creator and apply textures (provided by the DazStudio model). Play around with the layers (roughness, metallic, micro roughness) to find a goodlooking result.

And here are some render results.

Looking nice for now


And finally: apply the hair mesh to the character.

And here we are, a proper superman with superman hair!


Hair is done. Now, time to work on the suit !

To make the suit, let's play around with nostalgia and honor iclone 5. I wil use G5 clonecloth bodysuit.
Step 1: export to .obj.

Step 2: export in Blender.

Step 3: subdivide the mesh. I will spend the next day working on the realism of the mesh by sculpting it, simulating the muscles and conform the tissue mesh it to the body mesh of superman.

After some time working and sculpting in Blender, the suit is finally shaped to the body.

Some view from the back.


Thanks to the subdivision, sculpting the muscles was easier and the result look promising.

let's focus now on the "decorations" of the suit.

This was, for now, the hardest part. After spending most part of the day on trying again and again editing and sculpting...

... The details look kinda good !

Duplicate the mesh on X axis...

and take the time to readjust everything so that it fits the costume properly.


This is some goodlooking suit.

I shall now explain how I created the "S" symbol, which ware very easy compared to the previous step. I thought I was going to tear my hair out. But hey... That's what modelling is for, teaching patience right ?

Let's work on the default cube in Blender.

Subdivide it several times.

Keep only one face.

Cut it and shape it till it reminds the "S" shape of Superman. Next start sculpting.

After a few moments, make some readjustments, triangulating the faces and decimating...

Mark seam on the S mesh for UV export.

Done!

Next step: The boots. Export to .obj the flat boots from G5 clonecloth.

after some working on the details, import the suit without textures in Character Creator. Make sure it is properly weighted to the body.


Some details of the suit.


Find suit patterns in google to start making the texture.

Making suit texture in photoshop


And here it is: SSS suit texture.


Making SSS boots texture


Looking nice for now !

And here is the cape model (always Daz...) I will work on to add it to the suit.

Some adjustments were made sculpting the face through Character Creator. I did again the eyebrows too, to make the look more like Henry Cavill's.


Some work needs to be done yet.

I tried to put a lot of effort in the skin details and wrinkles.


Facial textures improvements 2.0


Working on a new hair model...


Need some base to hide all the holes.

And here it is: the hair is finally complete.


First cape test
And here it is: first test clip of Superman walking.
It starts to look good ! The textures need more working in photoshop though. All rendered in iClone 7 and After Effects.

Adding some muscle details to the suit

Subtle, but efficient !

Made some updates on the cape in blender.
First video to submit to the contest, facial animation done with Faceware, rendered in iclone and After Effects.

The cape is now much closer to the suit and the skin.


Contest Submit: Turntable picture.

Contest Submit: Turntable picture.

Contest Submit: Turntable picture.

Contest Submit: Turntable picture.

Finally purchased the makeup and sfx bundle for character creator. Gonna update the textures on Superman's face.

Updating the eyebrows, much more realistic now

starting to look better and better. Updating the eyes texture to make it look smoother.

Still have to do some work in Photoshop.

Still updating the face texture in photoshop: light the darkest parts.

Apply the modifications. Skin looks much more realistic.

Apply new eyelashes.

Modify the eyelash texture in photoshop.


Make the eyelashes shorter.

Apply the modifications.

Modify the eyelashes position and shape to make it fit the eyelid.

For the next scene I'm working on for the Contest, it is necessary to make a Clark Kent character. To do so, let's change first the hair model, using again DazStudio.

Import hair in daz

Export at obj

Import in Blender

Decimate to reduce the high number of polys

Import Clark's body mesh base and sculpt the hair base until it fits properly the head.

Export the hair and replace the previous version.

Import Clark Base through Character Creator.

Cloth him properly to make him looks more like Clark Kent's style.

Add glasses (of course)

Create the hair.

Not so bad huh ?


Turntable picture for the Contest. Rendered in iClone.


The next pictures were rendered with Iray plugin.


Changing the light setting to play around.


Work In Progress of the next scene I've been working on all week.

Placing the different characters.

Camera work #1

Camera work #2

Camera work #3
CC Digital Human Contest 2020 - Turntable video

Doing some postproduction in After Effects.
Classic Superman 1978 end revisited in iclone 7
Superman & Green Arrow fan scene

Some renders made in iclone for the contest.


This scene is the submission for my Flash Character, but since there is Superman too, so I put it here also. Justice League postcredits scene revisited in iclone, with the Flash of the CW show racing Superman.